I must admit, even having been to Maine and enjoyed their blueberries (and yes, even contemplated ways in which I could move to Maine), I only understood two of the three title words in this dish. Yet having left my February Baking Across America baking to the very last day of February (two family birthdays with a birthday party over the course of eight days had a bit of an impact), this dish kept coming to mind. It looked good. It looked achievable. It looked summery, which was appropriate for our last day of summer. I had to find the suggested alternative for graham crackers (digestives), and order them alongside sour cream and frozen blueberries, and then I was good to go.
This was one of those dishes that got started one day and finished another. Thank goodness for dry ingredients. After trying to break up digestives for a bit on Friday and then Saturday morning, I then remembered our new and lovely and powerful blender. Bliss. Blitzing bliss. Sugar and digestives and cinnamon looked like sand in no time. I discovered I cannot hold a knife in my left hand (come on, who does?!), so my Scottish crumble skills came to the fore. Sorry if that makes this less legit, but honestly, it was pure luck that the blueberries were tiny, as specified in the recipe, and not the giant ones of the previous packet. Aussies are not so particular about our blueberries as this dish specifies.
I actually managed to get to the last step of the process before putting it in the tin before S came in hauling the ladder to help me. Then by the time she had washed her hands then told her sisters she was helping me then blown her nose and washed her hands again, it was actually time to put it in the oven.
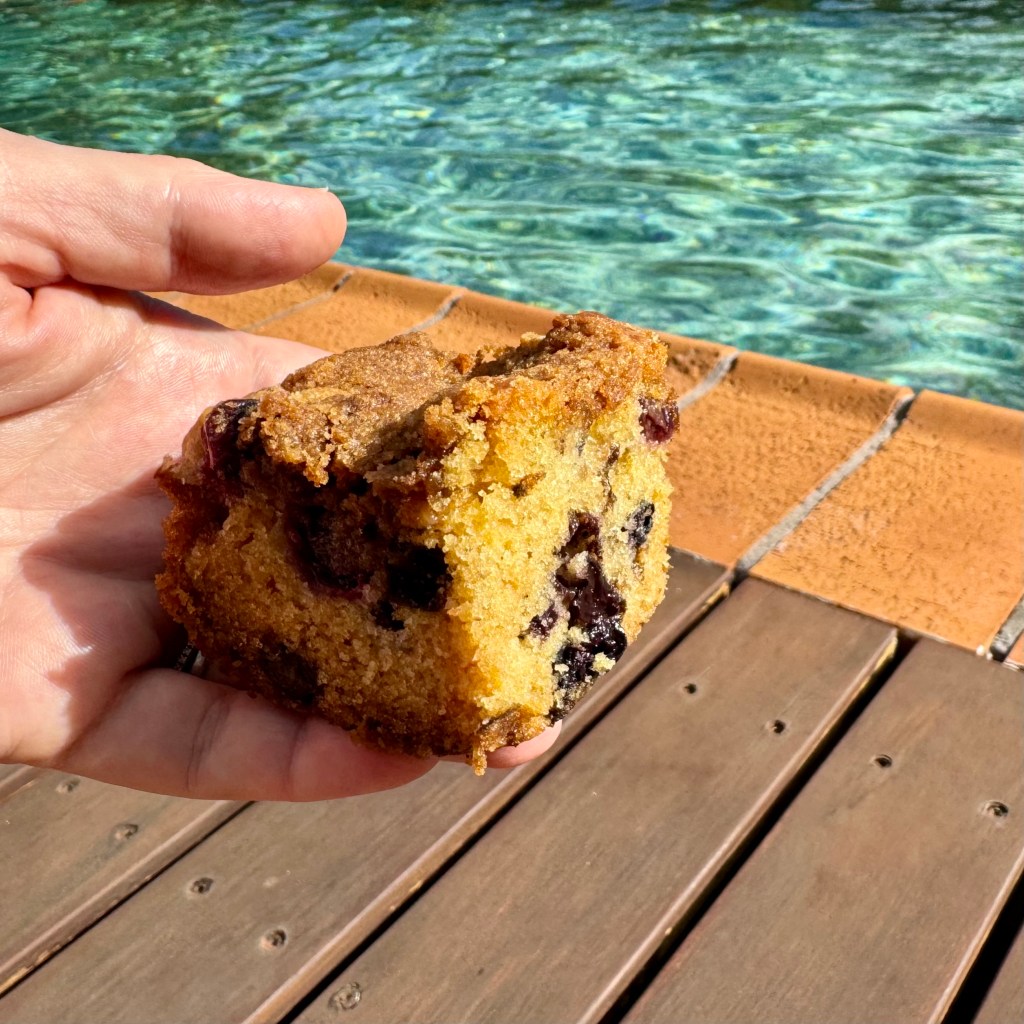
This was one of those dishes that as I was putting it into the tin I thought, “This is too stiff”, and as I was bringing it out of the oven I thought, “Did I burn it?” Yet, having let it cool for several hours, slicing into it was a dream. A crispy promise of baked sugar with moist cake beneath. Goodness.
And because it was our last day of summer, we took a few pieces to a friend’s place for a swim in their pool.
Which. Was. Glorious.
We had it to ourselves. It was clear and summery and warm and just utterly perfect, and having a treat by the side of the pool made it the best swim of the season. Our host enjoyed a piece with me while the girls got straight down to the business of swimming. But after a bit, S was out and having half a piece before wiping crumbs from her face with her sleeve and getting back into the pool. I think she had three pieces in total. S and C relaxed on the deckchairs with a piece each when I finally had everyone out of the pool and I have been assured that it will be a welcome addition to lunchboxes. What a win.
Australia Day. It’s a bit of a fraught occasion, and understandably so. But until the powers that be come up with an alternative day that doesn’t have the issues the current date does, January 26 is going to be the day we celebrate the good things about being Aussie. Healthcare. Education. Low gun crime. Breathtakingly beautiful landscape. Venomous creatures galore. Creatures found here but nowhere else in the world. And our food! Vegemite, Milo and Tim Tams abound in lists of typically Aussie foods and are packed carefully for overseas trips to share with expats and the curious.
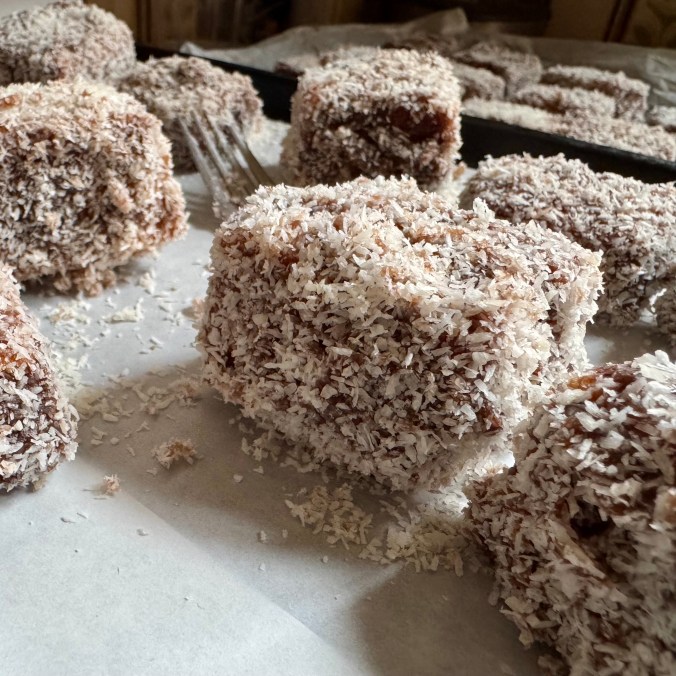
Today, though, I wanted to make a staple sweet that is on offer at every decent gathering. One that is doused in coconut and so eaten by me in a combination of duress and national pride: the lamington. As it was invented just up the road from where I lived in high school, I feel a duty to like it and bring up my girls knowing this delight of sponge and chocolate and coconut that gets stuck in your throat and demands you take a swig of your beverage of choice. Even though I am decidedly not a fan of coconut, lamingtons are impossible without it, and also if anyone comes in and says “I thought I’d change it up a bit and use crushed almonds/chopped pistachios/extra cocoa powder/chopped cranberries” or anything else then my eyebrows will go down and my eyes will narrow and I will lament the way of the world. Lamingtons are very simple. Don’t stuff it up. Here goes.
Oh. This is the easy way. The achievable way. The “I’ll just make lamingtons” way. Not the way of making your own sponge and making your own jam and milking your own cows to make the cream. Not here.
You will need:
Bought sponge cake, preferably the double rectangular variety.
Chocolate topping or syrup that is not too thick. If it looks like it’s set to be a science experiment in viscosity, skip it. Or buy it and water it down a bit.
Optional: cream for whipping, and strawberry or raspberry jam. The sort of jam you would have found in the 70s, none of this 100% fruit business.
Desiccated coconut. Sigh. On the upside, it uses a lot so I currently have not much left.
What you do:
Whip out your baking paper or reusable baking paper. Cover a couple of trays with the paper.
Cut your sponges into bits. How big is up to you. I don’t think there’s a standard lamington size. I went with rows about 2cm wide then cut them into three, so about 4-5cm long.
If you are doing optional filling, whip some cream. It does’t have to be stiff peaks or anything, just a bit stiffer than dolloping out of the tub. I didn’t want to do all the lamingtons filled so I started with about 1/3 cup which was too much.
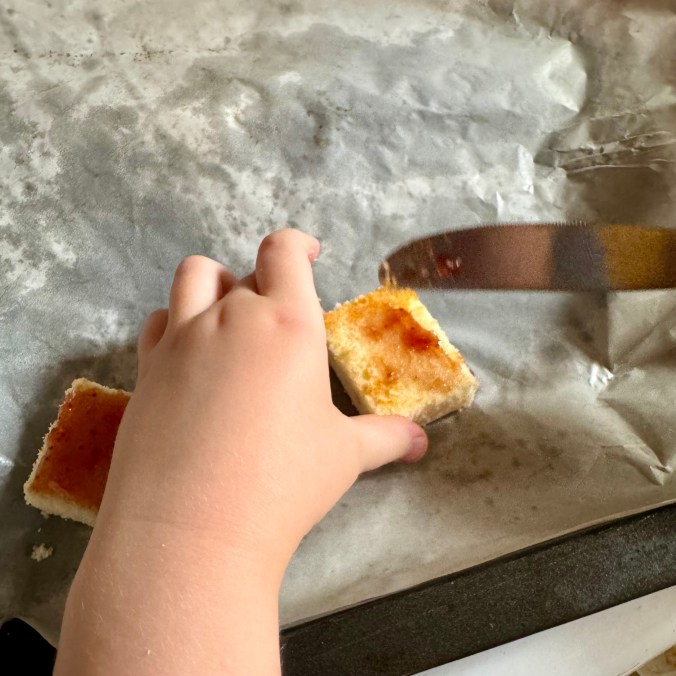
Prepare yourself. I move left to right, so I recommend sponge, jam, cream, tray. The bottom of each pair of sponges gets a bit of jam on its top. The top of each pair gets some cream on its bottom. If you have a helper, you may end up with jam on both bits. This is fine. We’re not entering these in a country fair or anything. Only a scraping of jam and cream is needed. Once spread, pop them together so jam and cream are touching and corners align, and put them on a tray.
When you have all the filled bits that you want on a tray, put that tray in the freezer for about 15 minutes.
If not filling the lamingtons, just cut as above and proceed. The next left-right work station is sponge, a bowl for the topping, a bowl for the coconut, lined trays.
Squirt a generous amount of topping into the topping bowl. Pour a generous amount of desiccated coconut into the coconut bowl. Both of these will need top-ups as you go.
Put a piece of sponge into the topping and flop it around using a fork or something. You just need a thin layer of topping on each side. Once coated, use the fork, Luke, to lift it into the coconut. Heap coconut onto each side and flop it around. The right amount of coconut will stay on the topping. Lift your lamington onto a tray. Done! Repeat the process with the remaining sponge bits and the filled bits from the freezer.
Because this is summer in Brisbane and the humidity is real, I put the trays in the fridge. This helps the topping stay put and not melt down the sides in a fit of ennui. If there are any left in an hour, probably transfer them to a container and probably keep them in the fridge.
Best eaten with a cup of milk or a milky tea to save you from choking on the coconut.
One of the things that will always make me feel like a kitchen goddess or just a half decent mum is if I bake something in the morning, before people are up for breakfast. We had a plan for Saturday and I imagined baking these Bing bars, breakfasting, then being able to take photos on our picnic blanket in the botanic gardens with dappled summer sun and warm blue skies and butterflies and green grass and happy children and … and life happened, instead. I prepped the night before (the virtue! the smug!), and was very glad I did because, if you haven’t tried this, pitting and chopping cherries to get 450g of them takes a long, long time. And then it was a Bad Night, where I was ditched from bed by E before midnight and she was awake and coughing and S was awake and awake and awake and Glenn wasn’t feeling great and I slept on the sofa and while it’s not such a problem it was also not very comfortable.
Having been a Bad Night, though, meant that E and S both had significant sleep-ins, so I could get on with baking this without endless “Mummyyyyyyy” interruptions. Extra kitchen goddess points for simultaneously making scrambled eggs for breakfasts as well as Biscoff toast and juices and cups of tea and sourdough toast and oh look at that more scrambled eggs. As the cherries took a while to cook down into jammy goodness, I also tackled some of Washing Mountain and felt extra smug.
This recipe was definitely not next on my list of what to bake from this book (Baking Across America by B. Dylan Hollis). I was planning on trying one of the northeast cookies, I think, but my mind just kept coming back to these. I mean, what even are Bing cherries? As it turns out, they’re cherries. Normal cherries. And Australian cherries are just sold as Australian Cherries, but Bing is one of the varieties grown and sold – Google has been my friend – so instead of resisting the urge and baking something else, I caved. We have abundant cherries at present so I didn’t even buy frozen, but risked buying two punnets and pitting and chopping them myself. Next time – and there will definitely be a next time as this was definitely a winner and has been definitely requested for lunch boxes – I will use frozen.
I am not one for selfies, but if I were, you would have seen my face in various stages of delight to worried to concerned to wide-eyed to panicked to blissed out to shocked to satisfied. What a ride. I think I possibly cooked the cherries down a little further than the recipe intended, because when it came time to transfer the mix onto the base, it turned out to be toffee. Pro tip: make somebody else wait to do what they want in the kitchen so that they clean out that tough sticky mess for you. Ahem.
Maybe it’s my Scottish heritage, but rubbing cold butter into oats and flour and sugar just makes things right. It settles me. Makes me feel connected to generations of Scots bakers before me, even if the butter isn’t really cold because this is Brisbane in summer and nothing is staying cold for more than two minutes out of the fridge. I had a slight moment when it came to the egg wash, as I drizzled it on as instructed and in the moment it took me to pick up my pastry brush, all the egg was soaked into the topping. A valiant effort was made to no avail, so one portion of the slice is impressively tan while the remainder looks ordinary but bland.
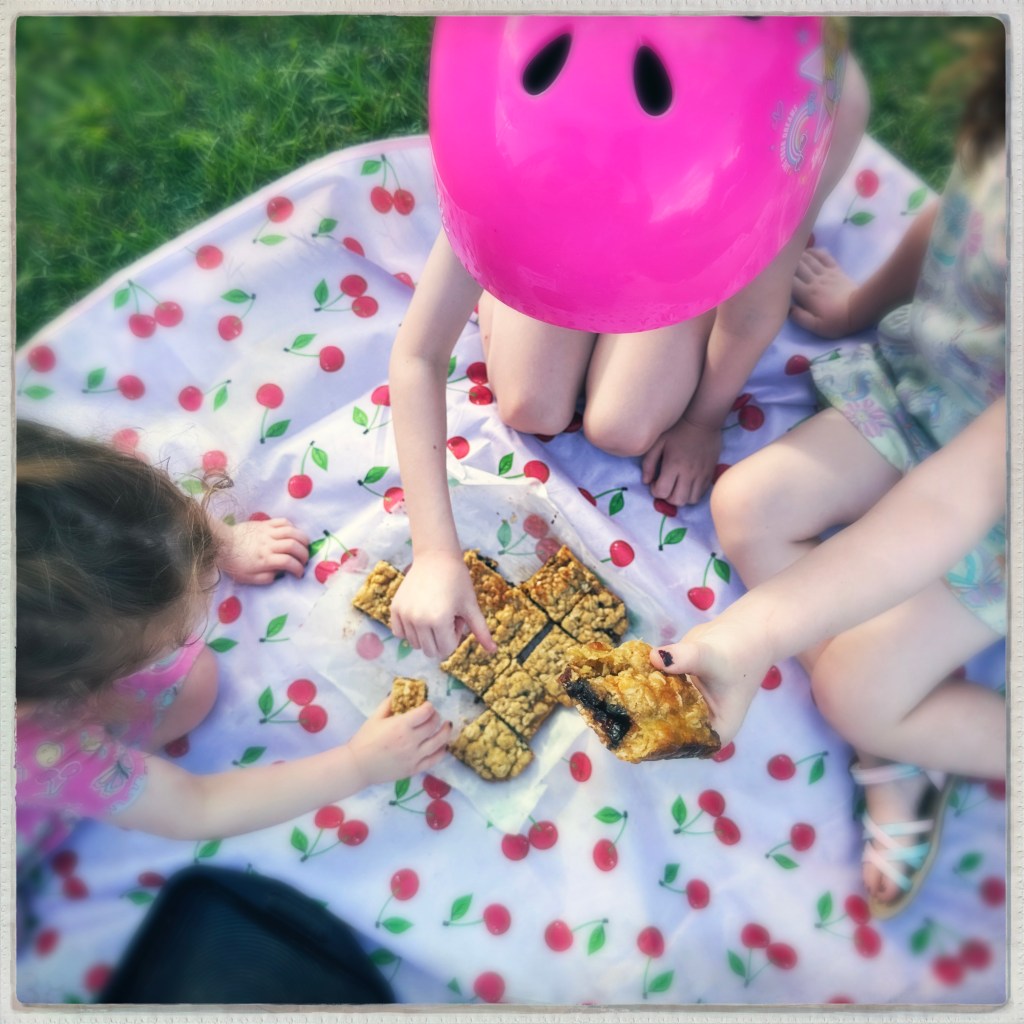
One thing I appreciate about this book is the absence of serving numbers. Who’s to say if a cake will serve 24, 12, 3 or 1? Exactly. I cut this slice into 16 squares which is a perfect amount for sating the sweet tooth but not going sugar crazy. Girls, as mentioned, loved it. Glenn is not much of a sweet tooth so had a half piece – see, it could serve 32 if it was just Glenn eating it – and seemed to enjoy it.
I was determined to take some photos outdoors, so when I took the girls outside in the afternoon we also took out the picnic blanket. What a thrill! We were just in time for late afternoon sunshine. Girls were mighty disappointed to be not eating the rest of the slice, but did their best to sneak bites anyway. We clearly left some crumbs around because every dog out for an afternoon walk was very excited, and one owner even brought her dog right into our garden. Wild.
“Mummy, whatever you’re baking in here, it smells *awfully* good”. With that ringing endorsement from C, here beginneth the journey of Baking Across America and a peach cobbler from Georgia. That is, as close as one can get when one lives in Brisbane and has zero access to Georgia peaches. However it is that they differ from Alabama peaches or Queensland peaches.
One of my Christmas presents from Glenn was B. Dylan Hollis’ book, Baking Across America. I have been devouring it whenever I can ever since. With books like this, I love to then make the recipes – I mean, duh. But in a methodical fashion, rather like Julie and Julia but without the stress. Being me, I would normally start at the beginning and be orderly about it. However, each area contains recipes with summer fruits and recipes without, and I know if I went through systematically I would give up fairly quickly from dejectedness over lack of ingredients. As it is, I have already sent my husband out searching for fresh cranberries without success and I will be taking girls with me for a full-on excursion in quest of them at some point. Peach cobbler was chosen because peaches and Brisbane summer seemed quite doable.
I ordered a box of imperfect peaches and let them ripen a tad, which meant that some of them did that weird thing of having foul spots while still being hard. Still, I washed eight instead of the instructed five and was glad I did. One was wonky on the inside, and two of them were tiny, so I figured this amounted to about the amount of five Georgia peaches. With girls watching Nightmare Before Christmas and Glenn relaxing on his sofa, I set to work and was instantly in a happy place. It has been a long time since I baked a dessert, or baked anything from a recipe book that was not for the purpose of lunchbox snacks or freezer snacks. Methodically slicing peaches and removing the flesh from the stone and transferring to a saucepan and repeating the process, knowing that this would turn into a tasty dessert, was an instant endorphin rush. I must do so more often.
This turned out to be a “trust the process”, er, process. I should probably point out here that I think I have both made and eaten cobbler once in my life before, and not any time recently. So my knowledge of cobbler process is limited and vague and reaching back a long, long way into my memory. Still, I expected peaches then batter, instead of melted butter then batter then peaches and juices then sugar, in a process that looked shockingly wrong and rather unphotogenic. Trust the process. Because, as I was fairly confident would happen, what looked entirely ugly and as if I had most definitely read the instructions entirely incorrectly, turned out to be exactly what it ought to be. A peach cobbler. Lovely soft cinnamon sugar peaches amid blobs of sweet batter.
A surprise, though, was the ultimate in jammy goodness hiding in sporadic pockets beneath the dough. We’re talking not just scooping out as much as possible for the next serving, but letting out an actual gasp of delighted surprise followed by furtive side eyes so as to sneak more of it. It was almost black, and it was camouflaged with the spots of stickiness that had to be worked to the extent that I felt my arms had earned another serve, and it was amazing.
Furthermore, this was one of those desserts that seemed to be a new creation the following day. I let the girls have a serve (with ice cream!) for morning tea. When cleaning up, I had a morsel of peach and ohmygoodnessme it had caramelised and gooeyfied and … I just can’t. It was glorious.
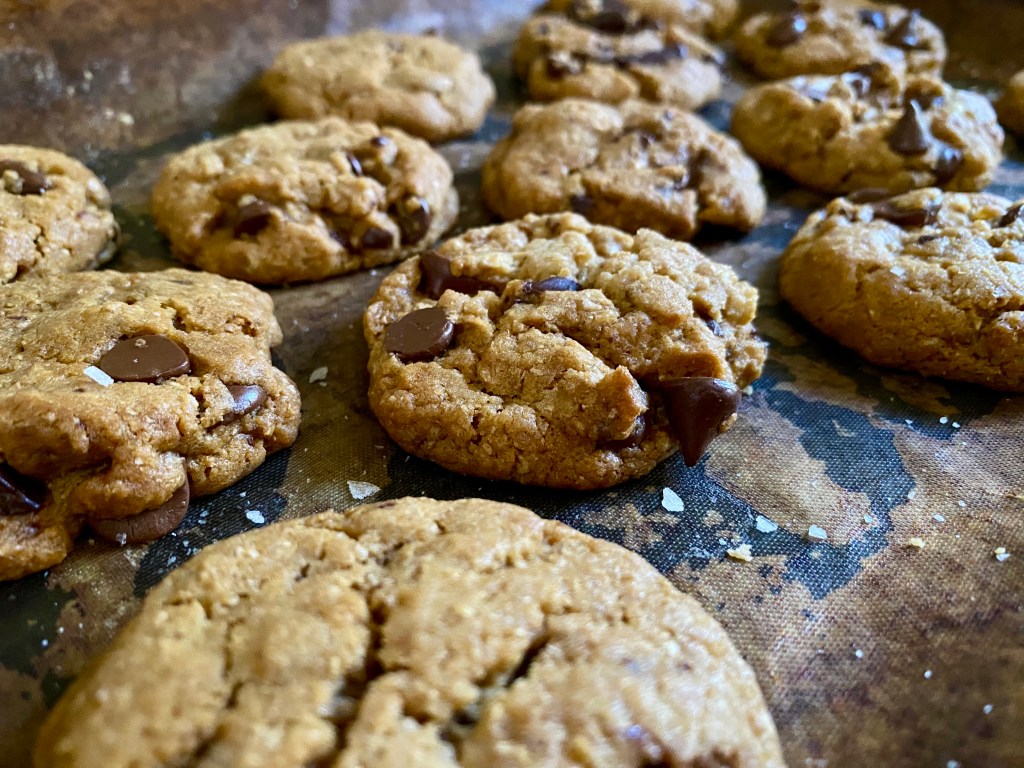
Are you ready to make the best chocolate chip cookies you have ever made? Of course you are. Here we go.
Start this recipe as far in advance as you can. “Ready in less than an hour” does not apply here.
Gather your supplies. You will need:
2 cups of wholemeal plain flour (white plain flour works fine here too)
1 teaspoon baking powder
3/4 teaspoon bicarb soda
1 1/4 cups chocolate chips – vegan if necessary
2/3 cup coconut sugar (or 1/2 cup packed brown sugar)
1/2 cup granulated or caster sugar
1/2 cup plus 1 teaspoon olive oil or coconut oil
1/4 cup plus 1 teaspoon water
Plus: 2 mixing bowls – 1 medium and 1 large; and measuring cups and spoons.
As you gather your supplies, children gather nearby, realising that baking is imminent. They clamour for the ladder which is allocated on a first come, first served basis. Second child gets to fetch the step stool from the bathroom. Third child is reminded how tall they are and actually don’t really need height assistance.
Start measuring your 2 cups of wholemeal flour into a medium bowl. A child will insist on doing this with you. The pride you feel when they tell you any of the numbers they see on the measuring cups is soon overridden by the spray of flour as they tip it only partially into the bowl.
Don’t stress it. Somehow this process makes it better. I don’t know how.
A teaspoon of baking powder and a very approximate 3/4 teaspoon of bicarb soda go in too. Children take turns to stir, sometimes remembering to hold the bowl. Some more flour mix may be launched out of the bowl. This is fine. We are fine.
Next come the chocolate chips, and relief. 1 1/4 cups of chocolate chips need to go into the flour mix. This is more than a standard pack of chocolate chips so don’t be complacent. Your helpers are at the height of helpfulness when testing of the chocolate chips is underway. Often this is their cue to leave you to yourself to get on with things, if they score enough of a batch to test for quality. Or to see if they prefer milk or dark. This is all important. Embrace it.
Next, bring out the large mixing bowl. Put the medium bowl out of reach of children. The chocolate chips are still visible in this mix so are at risk of further testing.
Into this bowl you will need 2/3 cup of coconut sugar (or 1/2 cup packed brown sugar which will end up thoroughly tested and quite spilled and therefore further tested); 1/2 cup of caster sugar; 1/2 cup plus an extra teaspoon of olive oil (or coconut oil but I personally can’t stand the scent so steer clear); and 1/4 cup plus 1 teaspoon of water. Mix this vigorously. I prefer using a fork for this but I realise most people are fancy and use a whisk.
When the mix is, you know, mixed, add the flour mix to the wet mix and stir with a wooden spoon. Mix just enough for there to be no more clumps of unmixed flour.
If you are baking these anywhere from October to April in Brisbane, you will probably need to put the bowl in the fridge now otherwise your cookies will become one. 15 minutes or so should do it, or as long as you need to deal with having a cheeky nap or changing a toddler nappy or putting out washing or if you just forget. It’s fine.
Get 2 baking trays and line them as you usually line them. Bring out the cookie dough and, if you’re feeling generous, let the helpers know you’re up to the next stage. Clean hands. Rings off. I make a line across the middle of the dough so I can keep track of how much for each tray, and then scoop a spoonful of dough into my hands to roll into a ball then onto a tray. Depending on the capabilities of the helper, they may need some guidance in the amount of dough to use, but I find if they have enough play dough experience they will catch on pretty quickly and not need help in rolling it into a ball. No need to stress if they taste test the dough. No egg, no worries. Winning. This batch makes 26 cookies which suits my preferred layout of 3-2-3-2-3 on each tray. Do a little squish on each dough ball, using cute little helping fingers or a fork.
Chill time is essential. If you can find room in your freezer for these two trays, good for you. Whack them in for 30 minutes. Otherwise, into the fridge for … some time. Like, at least four hours. I usually leave them until the next morning, but whatever works. When you remember them, turn on your oven to 175C. If you get your cookies out when you turn on your oven or if you leave them in the fridge or freezer until the oven is ready is up to you, it just affects the baking time. When the oven is hot, put the trays into the oven and bake for 10 minutes. If they are not looking like your preferred cookie consistency, keep them in for another 2-5 minutes. They should be a little bit golden brown.
Get your helpers out of the kitchen so you can open the oven and remove the trays. We put ours on our stovetop, with oven mitts on the sides closest to the front. Remind your helpers these are HOT and they are to keep their hands off. They will likely repeat this information to you, possibly while reaching out to touch the hot thing if they are a very sensory-seeking child like my 2yo. Keep those little fingers safe.
The next stage is, honestly, my favourite: sprinkling sea salt flakes over the baked cookies. Note that this is not the same as grinding salt over it so make sure your independent oldest child is aware of this and doesn’t accidentally grind pepper over your freshly-baked cookies. Sea. Salt. Flakes. Sprinkle them over, as sparingly or liberally as you wish. Leave the trays there while you deal with children wanting to do painting or needing morning tea or breakfast or whatever you’re up to, then transfer to a wire rack.
In our family, I will put aside a container of these for my husband (usually getting about 8 in a container) so that he actually gets to have some. Whatever remains on the tray after this and children wanting a cookie and then another and maybe a third, goes into our cookie jar. And even though these are, you know, chocolate chip cookies and not known for their health benefits, because they use wholemeal flour and coconut sugar and olive oil, these are cookies I can say “Yes” to when a child wants one for breakfast or in the afternoon and know that it won’t make them any more crazy cuckoo bananas than they would have been otherwise. That’s always nice.
This recipe is from Katie’s Amazing Kitchen and you can find the original recipe here. I have tweaked it only very slightly to suit Australian measurements and our weather and our lunchbox compartment sizes.